Growing Edible Ginger in Plastic Trugs on a North-Facing Balcony
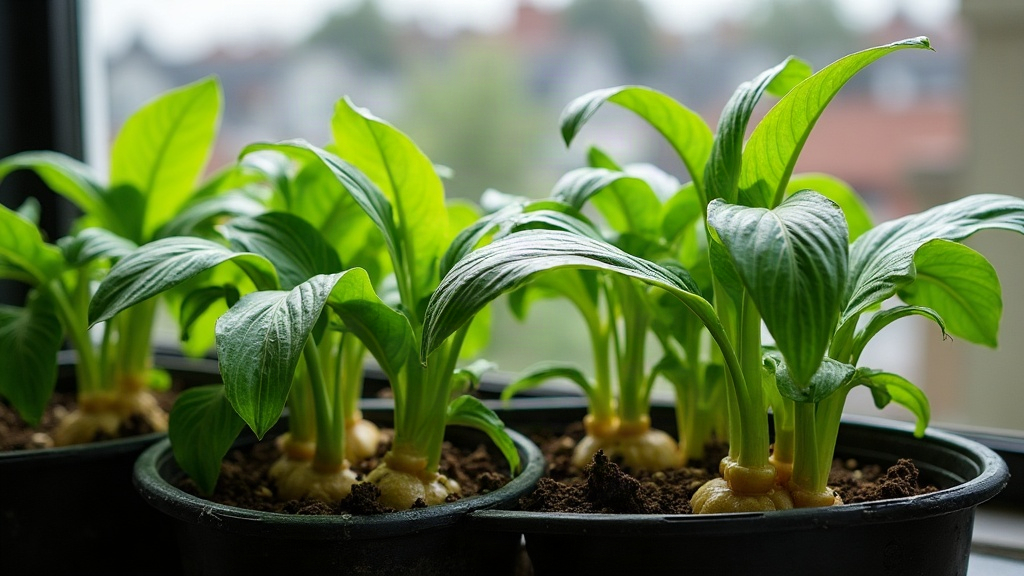
Growing edible ginger root (Zingiber officinale) in plastic trugs on a north-facing balcony works better than most people assume. Ginger is an understory plant by nature, it grows in dappled forest shade, not blazing sun like tomatoes or peppers want. Get the container setup right, keep things warm, manage moisture properly, and a shady balcony can actually outperform a scorching south-facing one for this particular crop.
Why Ginger Works in Shade
In its native tropical range, ginger grows under taller canopy plants, picking up filtered or indirect light for most of the day. Hit it with direct, intense sun and you risk scorching the broad leaves, plus the shallow rhizome bed dries out faster than it should. A north-facing balcony, with its bright but indirect light and no harsh afternoon glare, recreates that forest-floor feel surprisingly well.
A few things make shade-growing click:
- Bright indirect light - even with zero direct sun, a spot near a wall or railing usually picks up enough reflected daylight to keep ginger happy.
- Warm temperatures - aim for 68-86°F (20-30°C). Shade won’t slow growth down as long as warmth holds steady.
- High humidity - shaded balconies tend to hold moisture longer than sun-baked ones, and ginger loves that.
Why Plastic Trugs Are Ideal Containers
Plastic trugs (those wide, shallow, flexible garden tubs) suit ginger well because the rhizome spreads sideways, just under the soil surface, rather than digging down deep.
Why trugs beat deep pots:
- Wide surface area gives rhizomes room to multiply outward, the way they do naturally in open ground.
- Shallow depth (8-12 inches is plenty) keeps water from pooling at the bottom, which is where rot usually starts.
- Lightweight and movable - you can slide them around the balcony to chase whatever light is available as the seasons shift.
- Good drainage, once modified - drill a few extra holes in the base, since most trugs only come with minimal drainage out of the box.
Step-by-Step Planting Guide
1. Choose Your Rhizome
Pick up fresh, plump ginger from a grocery store or nursery. Look for pieces with visible “eyes” or small buds, the same way you’d check a potato. Organic ginger is the safer bet here, since the conventional stuff is often treated with sprout inhibitors that work against you.
2. Prepare the Trug
- Fill it with a loose, rich mix: equal parts compost, coco coir, and perlite does the job well.
- Make sure drainage holes are in place before you plant, not after.
- Skip heavy garden soil. It compacts fast and suffocates the rhizomes.
3. Plant Shallow
Lay rhizome pieces (each one with at least a single bud) horizontally, just 1-2 inches below the surface, buds pointing up. Space them about 6 inches apart in a wide trug so there’s room to spread laterally.
4. Water and Wait
Keep the soil consistently moist, never soggy. Shoots usually show up in 2-4 weeks, though cooler shaded conditions can slow that down, so don’t panic if week three comes and goes with nothing visible yet.
Managing Light and Warmth on a Shaded Balcony
North-facing balconies miss out on direct sun, so compensate with a few tricks:
- Reflective surfaces: light-colored walls or even a mirror panel behind the trug can bounce extra light onto the leaves.
- Grow lights: a small LED grow light on a timer, running 12-14 hours a day, makes a real difference in low-light climates. Cheap insurance against leggy growth.
- Insulation: wrap trugs in bubble wrap or shift them against a warm wall on cool nights. Ginger basically stalls out below 50°F (10°C).
Watering and Feeding Tips
- Water once the top inch of soil feels dry. Shaded containers dry out more slowly, so overwatering is the real danger, not underwatering.
- Feed monthly with a balanced liquid fertilizer or compost tea once shoots are established and growing.
- Mulch with straw or dried leaves to hold humidity in without tipping into waterlogged territory.
When and How to Harvest
Full maturity takes 8-10 months, but you can pull “baby ginger” earlier if you want something milder and more tender.
- Baby ginger: harvest at 4-5 months by digging gently around the edges and lifting a few rhizomes, leaving the rest of the plant undisturbed.
- Mature ginger: wait for the leaves to yellow and die back, usually around late fall, then lift the entire trug’s contents at once.
Store what you harvest somewhere cool and dry, or replant a piece right away to kick off the next cycle.
Common Problems on Shaded Balconies
- Leggy, pale growth: almost always a light issue. Add a grow light or move the trug closer to the railing edge.
- Rot or mushy rhizomes: nine times out of ten this is overwatering or blocked drainage. Check that the holes haven’t clogged up.
- Slow sprouting: usually temperature-related. A seedling heat mat under the trug helps a lot during the colder months.
Conclusion
A north-facing balcony isn’t the gardening dead zone people assume it is. For shade-loving ginger, it’s close to perfect. Plant in wide, shallow plastic trugs with well-draining soil, keep things warm and humid, add supplemental light when needed, and you’ll get fresh, fragrant ginger without a single hour of direct sun. Even the shadiest balcony, with a bit of patience, can turn into a genuinely productive little edible garden.